Guest Post written by Chris McKenzie who is an English teacher and a Coordinator of Educational Technology at a secondary school (grades 8-12) in Vancouver, BC. You can follow her on Twitter handle at mckc1
I’d like to share relatively simple idea that makes use of Google Drawing to annotate maps. This is great for historical maps because it’s easier to do than overlaying a map onto Google Earth. If you don’t know about Google Drawing, you can find it in Google Drive. Instead of creating a Google Doc, just go a bit further down the drop-down menu and select “Drawing”.
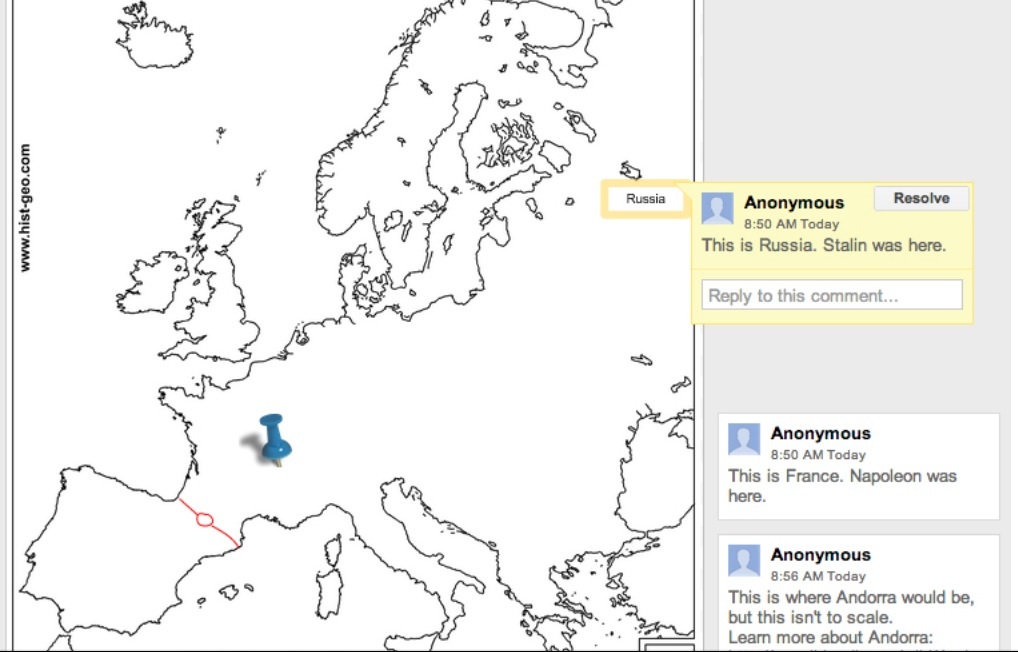
Then, when you are in the drawing window, “Insert” an image and resize the image and the canvas to your liking.After that, you and the students can use the line tool and scribble tool to draw on the map, use the text tool to write on the map, and use the insert image function to include other images. If you right-click on the lines, text, or images, you can select “comment” to add a comment to the right of the map. Move your mouse over the comment to see which part of the map it pertains to, or click on an element of the map to see which comment is associated with it. Best of all, because this is a part of Google Drive, multiple students can collaborate on it.
It may be worthwhile having students annotate a map before you teach them the lesson. As a form of pre-assessment, they could annotate it with what they know. Then, as the lesson goes on, they could revise their previous annotations or drawings to show what they’ve learned.
Depending on your purpose and the students’ ages, you may also want to have some small pushpin images or premade labels down the side so that the students have only to drag them into place.
Here is a sample map:

